Currently, you can use new visual styles on XP in two different ways. Both options work around the requirement that visual style files must be signed. First, I am going to explain how to use, as well as the benefits of using, TGT Soft’s Style XP to use new visual styles. Then, I am going to show you how to use patcher XP as well as the benefits of using it. But first, I am going to show you where to download visual styles that can be used on your computer.
Downloading visual stylesMany cool sites on the Web offer thousands of visual styles to download. Unlike boot and logon screens, you do not need to worry about the version of a visual style because they are not system-critical files and their format does not change when service packs are released. This capability makes downloading them even easier, because you don’t have to worry about screwing up your computer.
Check out the following list of my favorite sites from which to download visual styles. I think you will find them very helpful.
_ ThemeXP.org (www.themexp.org) offers well over 1,100 visual styles for Windows XP. It is, by far, the leader in the XP visual style world.
_ XPTheme (www.xptheme.info) offers over 300 visual styles.
_ NeoWin (www.neowin.net/forum/index.php?showforum_36) offers a great theme forum that has a lot of quality visual styles.
_ deviantART (browse.deviantart.com/skins/windows/visualstyle/) is another good site for visual styles that has an easy to use navigation system that shows 24 thumbnails of visual styles at once.
_ TSS2000 (www.tss2000.nl) is a great site from which to get quality visual styles.
Although they require you to register on their site to download a visual style, this
requirement is worth it. They also have a large collection of Apple OS X-looking visual styles.
I personally like the look of the Apple OS X visual styles but do not like trying to make my PC look like a Mac. My favorite visual style is called iBar 4 set on the WinFlag color scheme. It is a nice blend between the OS X look and a Windows visual style. The iBar 4 visual style can be downloaded from www.deviantart.com/deviation/ 4650418/.
Many more sites are available from which you can download visual styles, but the sites mentioned previously will give you plenty of styles, more than you are likely to ever go through or use. Once you have downloaded a few visual styles that you would like to use from the Web, you are ready to extract them and place them in the appropriate place on your hard drive.
Windows stores the default Windows XP-style visual style at C:\Windows\Resources\
Themes on your hard drive. This is also where you should extract all of your visual styles that you downloaded inside a folder that has the same name as the .msstyles file. If the folder is not named correctly,Windows XP may not recognize the visual style. Also, you will find that when you extract some ZIP files where there was a visual style, there may be a folder called shell. This folder contains other visual style data and should be put in the same folder as the visual style file. If you also have a .theme file included with the visual style download, you should place that in the themes folder instead of inside the visual style folder.
When you have finished installing all the visual styles that you have downloaded to the themes folder, you are ready to set up your computer so that you can use the visual styles. The next two sections will show you how to install them using the two different approaches already mentioned: using the shareware Style XP and using freeware patches such as UXTheme Multi-Patcher.
Using Style XP to use non-Microsoft visual styles
Style XP, which is made by TGT Soft, was the first program that allowed Windows XP users to use non-Microsoft visual styles. Style XP and the free patch that TGT Soft also released are responsible for creating the visual style world on the Web. In this section, I am going to show you how to use this interesting app to install and use all of the thousands of visual styles available on the Web to transform the way Windows XP works.
Style XP 2.0 offers a lot of new features, such as icon packages, as well as logon and boot screen management. However, we are just going to focus on the visual style feature because that is what made this program famous.To get started, you will need to get a copy of Style XP 2.0 from TGT Soft. Visit www.tgtsoft.com/download.php to get a copy of Style XP. Once you are on their site, you will notice that they offer a couple of different download packages.
Make sure that you download Style XP 2.0 full install. They offer two different versions of this install, one for men and one for women. The two versions are the exact same version of Style XP except they have different visual styles included as a convenience if you have not already downloaded other visual styles. But because you have already downloaded some visual styles, you don’t really have to worry about that.
Once you have Style XP 2.0 downloaded and installed, you are ready to get started using it. Follow these steps to get Style XP up and running:
1. Click the Start button and navigate to All Programs, then look at the top of your Start Menu when all programs are expanded by Windows Update. Expand TGT Soft to run Style XP.
2. When Style XP loads, click the Visual Styles button and Style XP will search your
Theme folder for new visual styles.
3. You will see a list of all of the different visual styles on your computer in the middle of the window. A preview will be shown when you click the different visual style names.
4. Once you find the visual style that you want to use for the whole user interface, click the Apply Style to Current Theme button.
5. Your new visual style will now be applied. If you are satisfied with the new look, close Style XP and you are finished. If you’re not satisfied, go back to Step 3 and start over. As you can see, Style XP provides a very easy mechanism to change the current visual style that the Windows XP skinning engine is using. If you decide to download more visual styles, just install them and restart Style XP so that it can detect the new visual style. Then you will be able to change the visual style just as you have done previously.
Using UXTheme Multi-Patcher to enable use of non-Microsoft visual styles
Style XP 2.0 is not a free program. It provides an easy way to change the visual style, as well as a bunch of other features such as the ability to use visual styles without having to modify any skinning engine to accept non-Microsoft signed visual style files.With this convenience comes a price that you have to pay, if you want to use the program for more than 30 days.
If you would like a free solution to using non-Microsoft signed visual styles, then the best option is a program called the UXTheme Multi-Patcher, which will allow you to patch the visual style engine. This patch will remove the code in the engine that checks for a Microsoft signed file, which will then allow you to use any visual style that you want.
Another program that will also patch the visual style engine is known as Patch XP. However, there are various versions of XP, such as Original, Service Pack 1, and Service Pack 2. Each of these versions has a slightly different visual style engine, and that requires a program to bewritten for each specific version. I like to use the Multi-Patcher because it can patch different versions of Windows XP, unlike Patch XP, which requires a specific version for each Windows XP version.
UXTheme Multi-Patcher is developed by an XP user known as Windows X and can be downloaded at their Web site located, at www.windowsx.org/enhance/myvs/uxtheme.html.
Download a copy now and perform the following steps to patch and change the visual styles on your computer without having to use Style XP:
1. Once you have downloaded the latest copy of the Multi-Patcher, double-click the Exe to start up the program.
2. When the Patcher loads, you will see the main program screen. Hit the Patch button
.
3. The OS Detection screen will pop up, asking you to confirm the Windows XP version that you are running. If the information is correct, click OK to continue.
4. When the patch is complete, you will be prompted with a screen asking you if you want to restart. Click Restart, if you want to restart now, or you can always restart at a later time. However, the visual style engine needs to be reloaded in order to accept non- Microsoft visual styles.
5. Shortly after the restart screen is shown, a Windows File Protection window may show up.Windows XP has detected the change in the system file and wants to replace the system file with an unpatched version. Click the Cancel button so that Windows XP does not replace the patched file with the original file.Windows will make you confirm your decision by popping up another window; click Yes so that you keep the patched version of the file.
6. Once you reboot, you will be running the patched version of the visual style engine.To change the active visual style, right-click the desktop and select Properties.
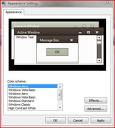
7. Then, click the Appearance tab and adjust the visual style by changing the Windows and Buttons drop-down box.
8. After you change the visual style, also consider adjusting the color scheme. Many of the visual styles that you download have different versions stored as different color schemes.
9. Once you are finished changing the visual style, just hit the OK button to save your changes and view the new visual style.
If you have problems with the UXTheme Multi-Patcher after running the patch, you can always revert to your original system file by running the Multi-Patcher again. Doing so will display an option that allows you to revert to the original visual style engine file.
Windows XP includes a new skinning engine built into the operating system, which it uses to display its own skin format, known as visual styles. Visual styles are responsible for transforming the boring old Windows classic look into the colorful and visually pleasing Windows XP look. Unfortunately, Microsoft has decided to keep the format of visual styles secret and builtthe skinning engine to only accept Visual styles that are digitally signed by Microsoft. This decision puts a big roadblock in the path of creating your own visual styles. On top of that, Microsoft decided that they were not going to release any more visual styles, so we are all stuck with the default Windows XP look.
This presented a problem to the Windows XP tweaking community. Everyone wanted to take advantage of the new visual styles engine that was built into Windows XP and create his or her own visual styles.When I first started to use Windows XP, I spent a lot of time trying to figure out how to create my own visual styles. I tried using Resource Hacker on the visual style file that came with Windows XP to replace the bitmaps inside the file. I was sure that this attempt would work, but when I tried to view the visual style in Display Properties, the rendering was very strange in the Preview window, and when I tried to apply it, the computer would revert to the classic Windows interface. After spending some time browsing the Web and reading forums, I found out that the reason why my new visual style was not working was because the file was not digitally signed by Microsoft. Apparently, even if you modify a file that was signed by Microsoft, the signature is broken because the checksum of the file changed when you replaced the bitmaps.
What would be the next step? Well there were two options: either try to fake a digital signature on the theme file or just remove the digital signature requirement from the visual style engine. Faking a digital signature is very difficult, if not impossible, so removing the digital signature requirement was the only plausible choice. This was the limit of my skills. I had no clue how to remove the requirement other than opening the file up in the hex editor and starting to delete random bytes.
Thankfully, someone else figured it out. A company called TGT Soft (www.tgtsoft.com) released a program called Style XP, as well as a free patch that you could use. All you would have to do is run the patcher on your computer and let it go loose on your uxtheme.dll file, which is the heart of the visual style engine, and it would remove the digital signature requirement. You’ll soon learn how to use the Style XP shareware for making lots of interesting changes, in the section entitled Installing New Visual Styles.
The development of Style XP and its runaround of the Windows XP signatures created shockwaves in the skinning community. It would now be possible to use different visual styles to take advantage of the new skinning engine. Sites such as ThemeXP.org sprung up, offering hundreds of visual styles that XP users all over the world made. Everyone was happy, except for Microsoft.
Eventually,TGT Soft found itself in a little trouble when Microsoft found out that they
released a program that bypassed the requirement. Microsoft could have blown this company
out of the water, but they were very generous and allowed TGT Soft to continue to develop its product and helped them write a service that ran in the background so that they would no longer have to hack the system file.
Nowadays things have changed a little bit.TGT Soft still offers its Style XP application that can be used to unsign visual styles, but it is still shareware. Thankfully, there is an application called the UXTheme Multi-Patcher, which will patch the skinning engine just like the old TGT Soft patch. More will be discussed about the patchers shortly, in the section entitled Using UXTheme Multi-Patcher to enable use of non-Microsoft Visual styles.
Note: It is a little unclear what Microsoft thinks about users of Windows XP bypassing its digital signature requirement for the visual style engine, using applications such as UXTheme Multi-Patcher. Taking a look at the whole situation, they really do not have a reason to be upset because it is not like the Multi-Patcher is contributing to software piracy. Additionally, the ability to use thousands of visual styles available on the Web with the fast native visual style engine is a great reason
to upgrade to Windows XP. From a marketing standpoint, Microsoft should just forget about the stupid protection. It would make users of Windows XP happier because they would be able to customize their computers easier.
So, you’ve now learned a brief history of how one of the best new features of Windows XP became unlocked. These next few sections will show you how to install and use new visual styles on your computer to completely transform the way the user interface looks.
Using the wallpaper PowerToyWe all like changing our wallpaper every once in a while.We get tired of staring at the same old photo or pattern and like to select a new image that we downloaded on the Web or made ourselves. Back in April of 2003, Microsoft released a series of creativity fun packs that included all sorts of neat things, such as different types of themed templates as well as a few new PowerToys. One of those PowerToys was called the Wallpaper Changer. This PowerToy is an application that will automatically rotate your wallpaper over a given period of time that you set. Additionally, you can specify a folder of images to use so that you can control which images are rotated.
I like to use the Wallpaper Changer to change my wallpaper weekly, although it is possible to set it up to change your wallpaper every 15 minutes. If the Wallpaper Changer is something that interests you, visit www.microsoft.com/windowsxp/experiences/downloads/ create_powertoy.asp to download a copy yourself. Then, follow these steps to configure it.
1. Once you have installed the Wallpaper Changer PowerToy, you can start it up by clicking the Start Menu, navigating to All Programs, expanding PowerToys for Windows XP, and then selecting Wallpaper Changer.
2. When the Wallpaper Changer has loaded, select the folder that you want to use as your source of the images using the browsing box.
3. Then, just set the interval between wallpaper changes by sliding the marker across the line.
4. Once you have the interval set, just click OK and your settings will be saved.
The Wallpaper Changer will allow you to customize your desktop like never before. Now you will always have a nice-looking desktop that is always new.
Customizing the Behavior of the DesktopThe desktop is a pretty simple part of Windows XP. You really can’t do much to customize its looks besides changing the wallpaper. However, several different tools are available that you can use to add features to the desktop and to take advantage of some of its lesser known features. These next few sections will show you how you can use these tools to do cool things such as use multiple desktops or create a special Web page that will display live data, such as a weather report, from the Internet on your desktop.
Using the Virtual Desktop Manager PowerToyThroughout my computing career, I have used several different computing platforms that run all sorts of different window environments. Of all of them, KDE, which is a window environment for Unix and Linux, has become my favorite because of its implementation of the virtual desktop feature. If you are like me and do several different things at once on your computer, you can use virtual desktops to switch between groups of open programs rather than relying on the taskbar.
A couple of months after Windows XP was released, Microsoft released a Virtual Desktop Manager PowerToy. I was extremely happy to be able to get this feature on Windows XP. Although it is not exactly the same as the KDE version because it does not show a preview of what is going on in the window, it allows you to switch between desktops. The Windows XP Virtual Desktop PowerToy works by adding a new toolbar to the taskbar.
You can easily switch between your desktops by clicking the numbered buttons. Also, you can click the Preview button to see a four way split-screen of all of your desktops so that you can view what is open on all of them at once. Let’s get started with setting up the Microsoft Virtual Desktop Manager (MSVDM) on your computer. First, download a copy of the Virtual Desktop Manager from the Windows XP PowerToys Web site, located at www.microsoft.com/windowsxp/pro/downloads/ powertoys.asp. Once you have a copy of the PowerToys installed, follow these steps to get it up and running:
1. Once you have installed the PowerToy, you will want to unlock your taskbar so that you can place the Virtual Desktop Manager on it. Right-click your taskbar and select Lock the Taskbar Item only if there is a check next to the text. Otherwise, your taskbar is already unlocked.
2. When you have your taskbar unlocked, right-click the taskbar again, in the general location that you want the Virtual Desktop Manager to appear, and select Toolbars and then Desktop Manager.
3. This will make the Virtual Desktop buttons appear on your taskbar. I always like to get rid of the label to the left of the buttons.To do this, right-click the Virtual Desktop Manager and select Show Title to disable the label. This will only work when the taskbar is unlocked.
4. Now that you have the Virtual Desktop Manager set up on the taskbar, customize the way it works. Set up the background for your different virtual desktops so that you can easily determine which one you are on.To do this, right-click the Virtual Desktop toolbar and select Configure Desktop Images. Then, on the MSVDM Settings window, just select the desktop number with your mouse and then select the background image you want to use. Click OK when you are finished to save your changes.
5. The next feature of the Virtual Desktop Manager that I always like to customize is the shared desktop feature. This allows you to access the same taskbar on every desktop. There are times when it is nice to have this feature disabled so that your taskbar on the different desktop is nice and tidy, but that makes moving windows that you already have open on one desktop to another impossible because there is no way to right-click a window and send it to a specific desktop like with other Virtual Desktop Managers in different window environments. You can easily enable or disable the shared desktop feature by right-clicking the Virtual Desktop Manager and selecting Shared Desktops. I suggest you experiment with this feature to find the best setting for your personal taste.
6. The last feature that I like to modify is the animation feature of the preview screen.
Every time you click the preview screen, your screen will slowly shrink up into the fourway split-screen preview. Then, when you select a desktop, it will slowly expand to full screen. This is a nice feature, but unfortunately the quality of the animation is not very high. On computers that have larger monitors, the animation looks pretty bad and just becomes a delay that you have to wait for every time you want to use the preview screen. One easy way around this is to simply disable animations by right-clicking the Virtual Desktop Manager and selecting Use Animations.
The virtual desktop feature is now set up on your computer. Have fun playing around with the feature. Once you get used to it, you will find that it can help you when you are doing several things on your computer at once.
Changing the icons on the desktopThe new icons that come with Windows XP provide a much-needed change from the boring low-resolution icons of previous Windows versions. The new icons have started a whole breed of icons, known as the XP-style icons. There are now hundreds of Web sites started by artists where you can download their personal XP-style icon creations. My favorite site is
www.foood .net, which offers hundreds of very well-designed XP icons for free. Now that there are so many cool XP icons floating around on the Web, why not replace your desktop icons for a fresh new look?
Changing the desktop icons is very simple in Windows XP. The most difficult part of the process is finding good XP icons.To help you out on your hunt for cool XP icons, I have created the following list of some of my favorite icon Web sites:
_ Iconica: www.marvilla.us
_ I heart NY: www.iheartny.com/xicons
_ WBC Icons: www.wbchug.com
_ Foood’s Icons: www.foood.net
_ I-cons: http://i-cons.tk/
_ xIcons: http://xp.xicons.com
Now that you have a few good sites to start your search, it is time to actually change the icons on the desktop. As already noted, changing the icons is easy. But if you want to change the icon of one of the system shortcuts, such as the My Computer, My Documents, and My Network Places icons, as well as the Internet Explorer and Recycle Bin icons, then you have to follow a special procedure. Follow these steps to change any of the system icons:
1. Right-click the Desktop and select Properties.
2. When Display Properties loads, click the Desktop tab and click the Customize Desktop button at the bottom of the window.
3. Just click the icon that you want to change, and then click the Change Icon button.
4. When the change icon screen shows up, click the Browse button and navigate to the icon that you want to use.
5. Once you have selected the icon that you want to use, just click OK and your icon should change in the preview box.
6. When you are finished changing all of the icons, click OK to save your icon modifications and return to the Display Properties window.
7. Now, just click OK once more to save your changes.
Changing the system icons is pretty simple, but changing other icons on your desktop, such as program shortcuts and folders, is even easier. Just follow these steps:
1. Right-click the item for which you want to change the icon and select Properties.
2. If you right-clicked an application shortcut, then you will see the Change Icon button at the bottom of the window. If you are trying to change the icon of a folder on your desktop, you will have to click the Customize tab first and then you will see the Change Icon button at the bottom of the window as well.
3. Once you are finished changing the icon, click OK to save your changes.
Tip: If you want to change other system icons, such as the Internet Explorer icon, Drive icons, or the Folder icons, you will have to use a special utility. Many programs on the Web will allow you to do so, but the two that I like to use are called Microangelo (www.microangelo.us) and Icon Packager (www.stardock.com/products/iconpackager/). Now you will be able to benefit from all of the cool icons that are available for free on the Web. Because you have now finished customizing the look of your desktop icons, let’s move on to customizing the desktop.


 Currently, you can use new visual styles on XP in two different ways. Both options work around the requirement that visual style files must be signed. First, I am going to explain how to use, as well as the benefits of using, TGT Soft’s Style XP to use new visual styles. Then, I am going to show you how to use patcher XP as well as the benefits of using it. But first, I am going to show you where to download visual styles that can be used on your computer.


