To get started changing your icons, you are going to want to use the Folder Options feature you used in the last section. Follow these steps to begin:
1. Open up Folder Options again by clicking My Computer. Then when it launches, click the Tools menu bar entry and select Folder Options.
2. Inside Folder Options, click the File Types tab to reveal the list of all of the different file extensions on your computer.
3. Browse through the list and select the extension for which you want to change the icon.
4. Once you have the entry selected, click the Advanced button.
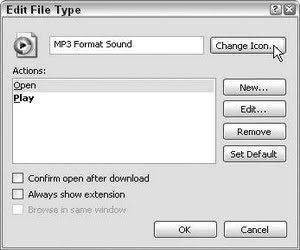
5. On the Edit File Type screen, click the Change Icon button.

6. The Change Icon screen will be displayed. Here, you will be shown various system icons from which you can choose. If you do not find any that you like, just click the Browse button and select an icon that you downloaded on your computer.
7. Once you find the perfect icon, click OK to select the new icon.
8. Then click OK once more to save your changes. You don’t have to reboot after you make your changes, because you will see your changes immediately after you click OK to save them.


0 komentar:
Post a Comment